I’m the only one in the house who enjoys pressure canned ham and bean soup. I like to have them in pint jars ready to go on the days I find myself home alone for a meal.
I’ve been trying to work my way through the stuff at the bottom of my freezer and came across a bag of ham. This ham was too salty for our liking but I think it will be excellent for flavoring these pressure canned ham and bean soup.
I’ll also add a bit of celery, carrot and onion as well.
In order for this pressure canned ham and bean soup to be safe according to the NCHFP the great northern beans that I’m going to use need to be rehydrated fully. “For each cup of dried beans or peas, add 3 cups of water, boil 2 minutes, remove from heat, soak 1 hour, and heat to boil.”
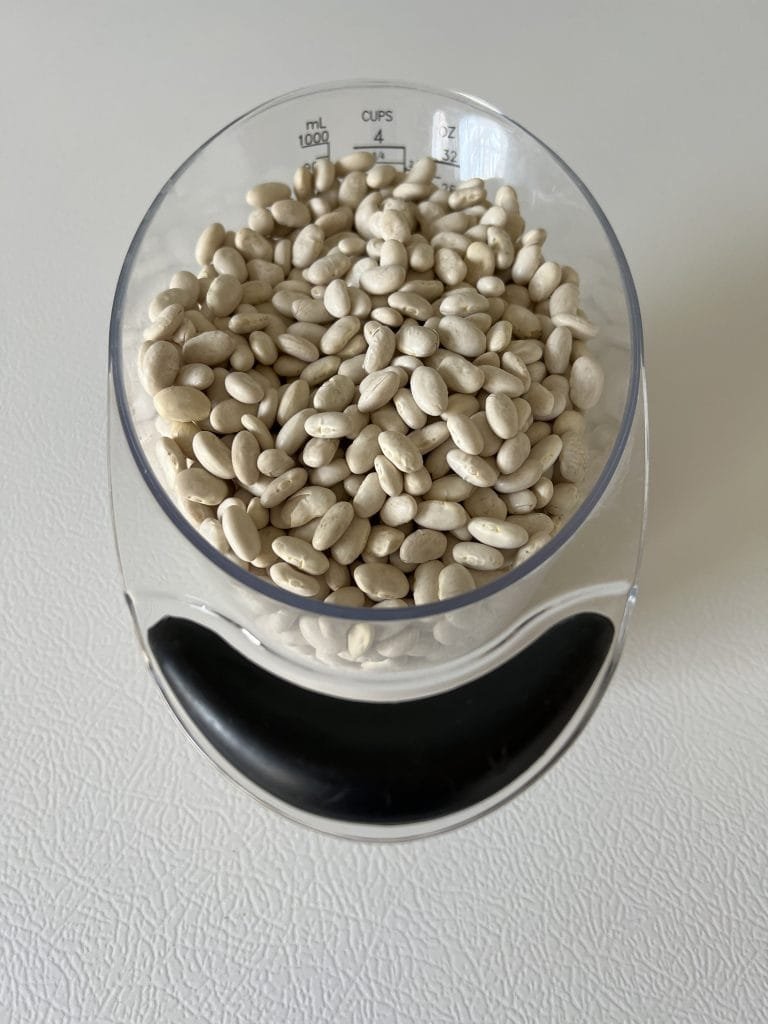
Start by measuring your beans. It takes about a pound and a half to fill 8 wide-mouthed pint jars which is 4 cups.
I keep a little cheat sheet on the inside cover of my canning book that reminds what I need to make this pressure canned ham and bean soup. This is how I know that I will need 4 cups of dry beans. I also wrote down how many jars of each type that my canner will hold. It pays to keep notes somewhere safe like your canning book. Here is the one that I use:

Get your copy here for only $19.95
Do you call it sorting beans or picking beans?
We’ve also heard it called, looking over the beans. No matter what you call it the next step is to sort through the beans to make sure there are no rocks or bad beans in the mix. The easiest way that I’ve found to do this, is by using a white bottomed bowl so that I can pour in a dozen or so beans and easily see a dark spot. You want to pull out anything that doesn’t look like the rest.
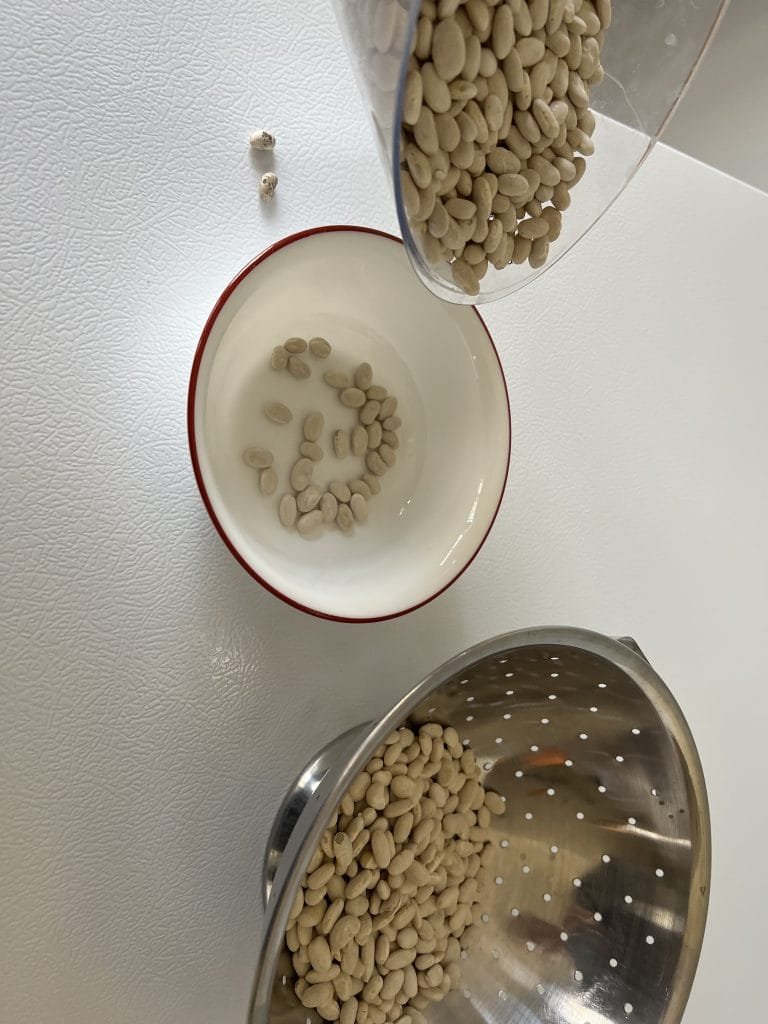
Wash, Wash, Wash Those Beans
Washing the dirt off is the next step. You’ll want to use a colander that the smaller beans won’t fall through. Don’t just give them a quick rinse, really wash them off good here. Get your hands into it and move them around while rinsing the water over them.
Rehydrating the Beans for Pressure Canning
Now you want to add them to a large enough pot that you can add 3x the water to. So in my case it is 4 cups of beans and 12 cups of water. I’m just eyeballing it because I know this pot well. It’s an 8 quart Cuisinart and I can pretty well judge the proportions of it.
I can also use it to judge a full 7 quart canner load of any vegetable. I just fill the pot almost to the top and by the time it all heats up and some air is removed from whatever we are canning, it measures 7 quarts perfectly. 7 quarts is the largest batch I can do in my pressure canner but with pints, they can be double-stacked. This gives you around 16 pint jars or 8 quarts total so having an 8 quart heavy pan is a good idea if you plan to really get into canning.
Put them on the stove on high and bring to a full boil for 2 minutes. Now just turn them off to soak for 1 hour.
During this time, you can start to prepare your onions, carrots and celery along with the ham you want to flavor it with.
I always use the pressure canner to heat the jars but there is no need to start it just yet. The beans get a new change of water and then have to come to a boil again before you can jar them up. So wait to start your canner with jars and water having the same water level (about to the 1/2 cup line is where I normally fill them to) until about 50 minutes into the hour long soak. Don’t forget your glug of vinegar to keep your jars from getting frosty. Waiting until 10 minutes before the timer is up to start the burner will ensure all of your water doesn’t steam away.
Prepare Onions, Celery, Carrots, and Ham
Get your vegetables and ham that you are using for this pressure canned ham and bean soup ready when your jars are heating. This will ensure that everything will come together at the same time.
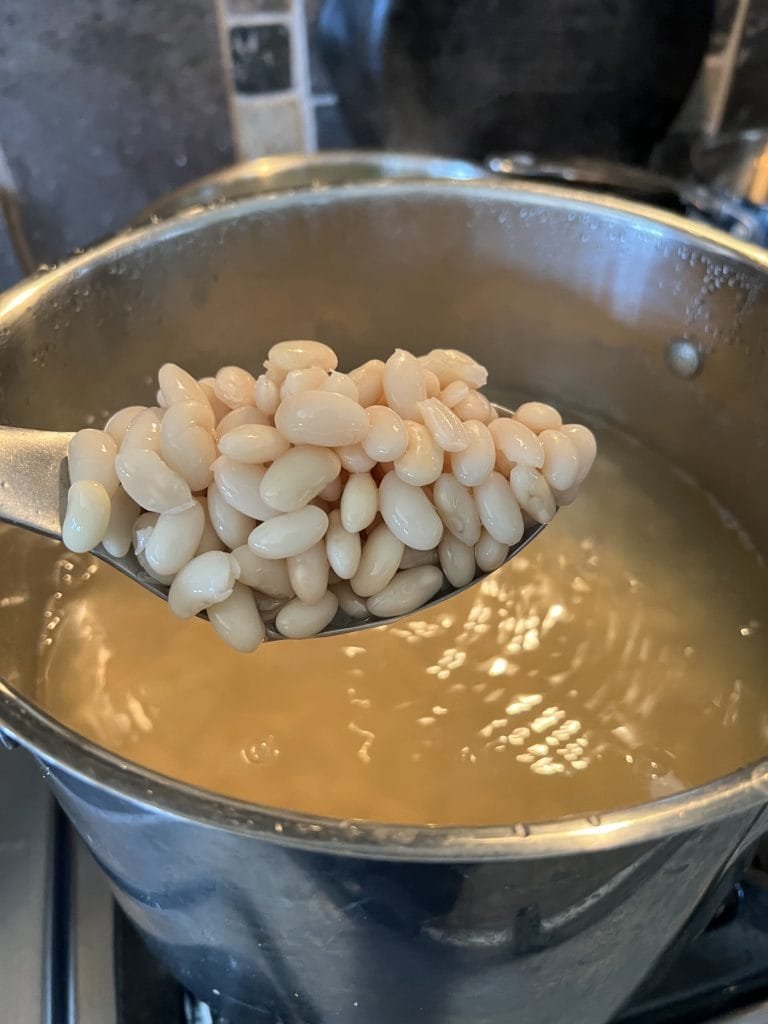
Drain and Heat Beans
After the hour long soak, you can go ahead and drain the soaking water off of the beans and add fresh liquid. Now bring it back up to a boil. (Your canner should be full of empty jars and water getting all hot and steamy right now)
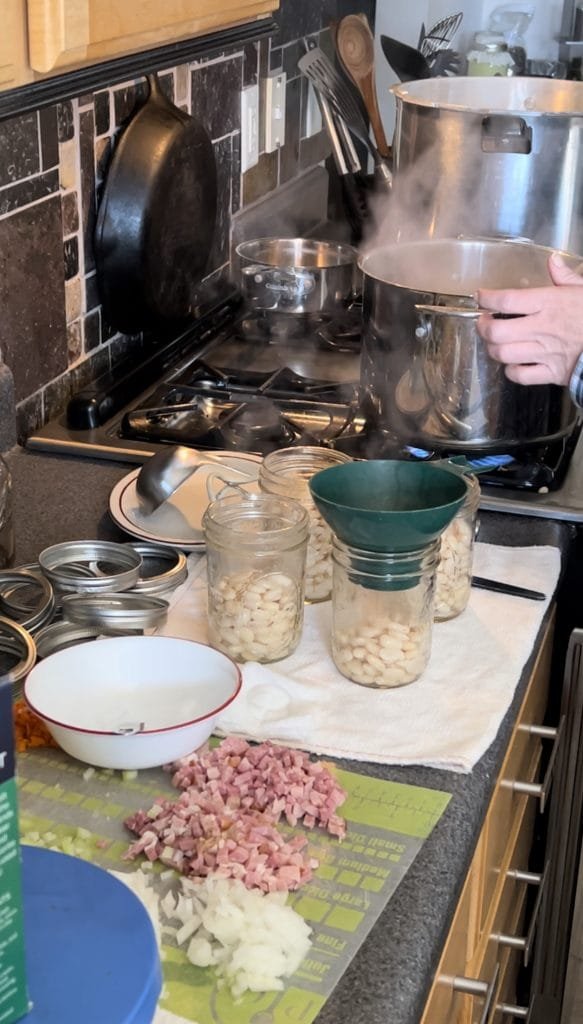
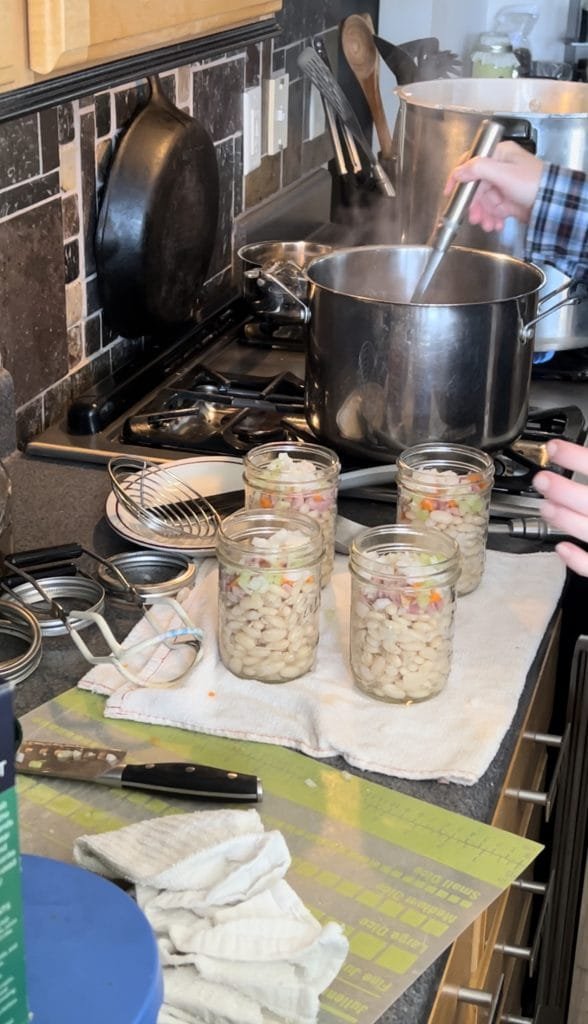
Here is what your setup should look like when you have everything ready to go. Right beside the stove so you don’t have so far to reach.
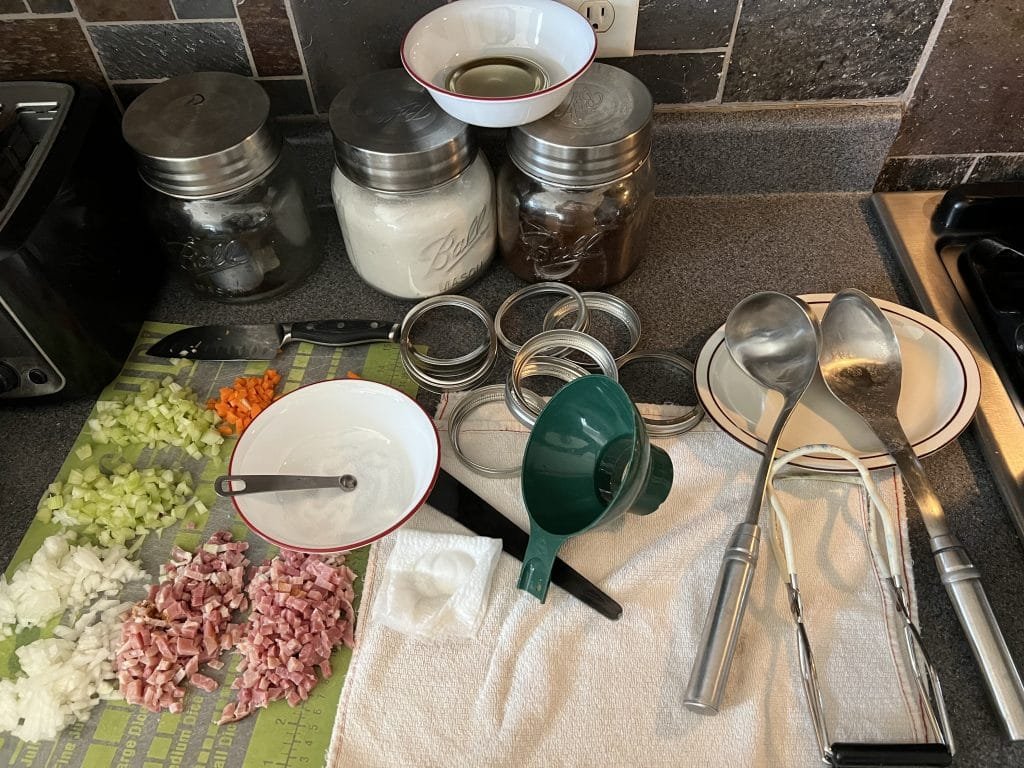
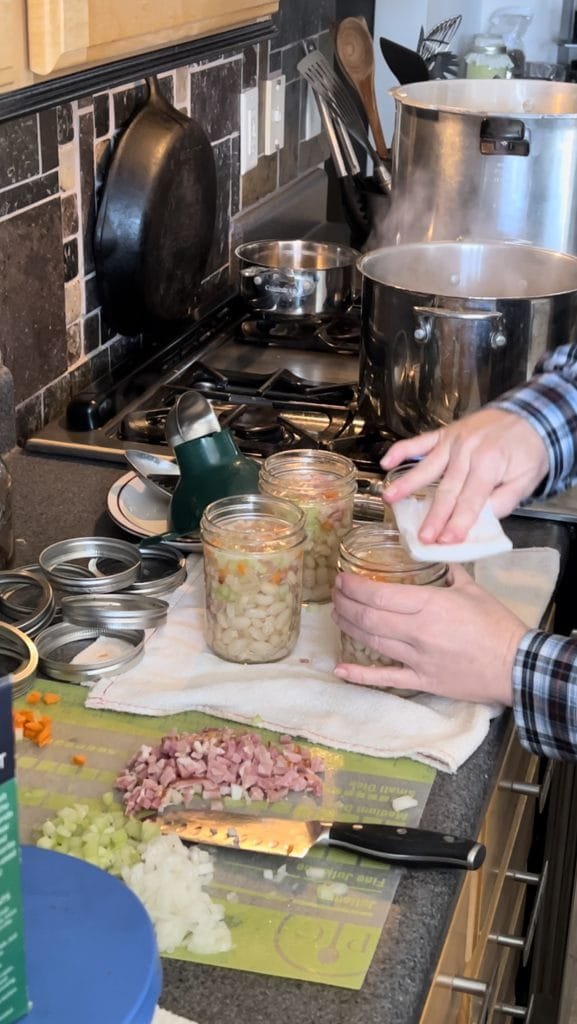
See the paper towel folded up? I have moistened it with white vinegar so that I can wipe the jar rims with it. This will help me to make sure I get good seals. There is nothing worse than going through all the motions of making pressure canned ham and bean soup for it not to seal.
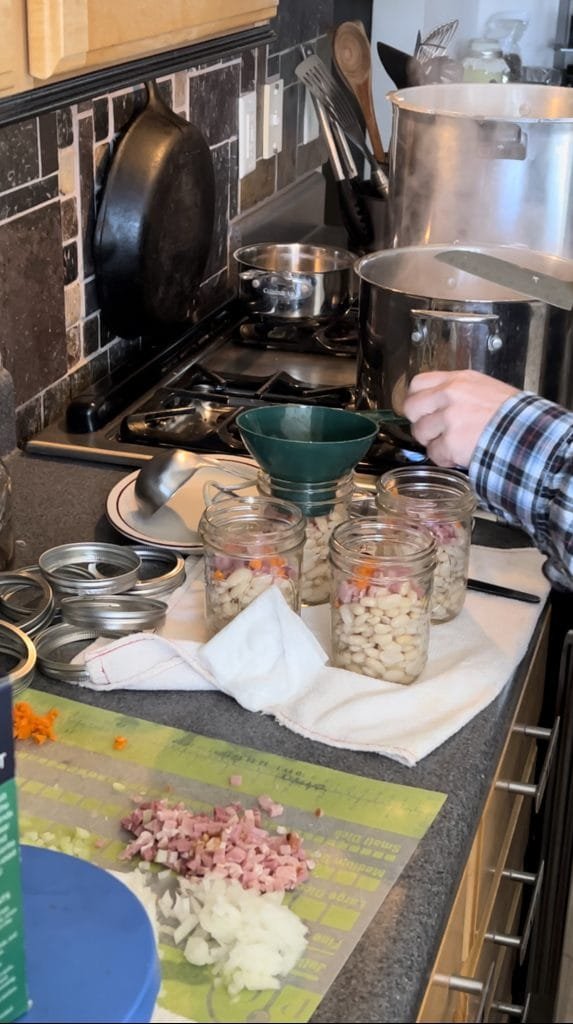
I am going to work up 4 jars at a time. They are currently hot in my steamy canner just waiting for me to add the beans. You can see in the above image that I have divided each of the added ingredients for this soup in half. I know that I am doing 8 jars total and I want each to be divided up equally. This helps save me time over measuring it all out.
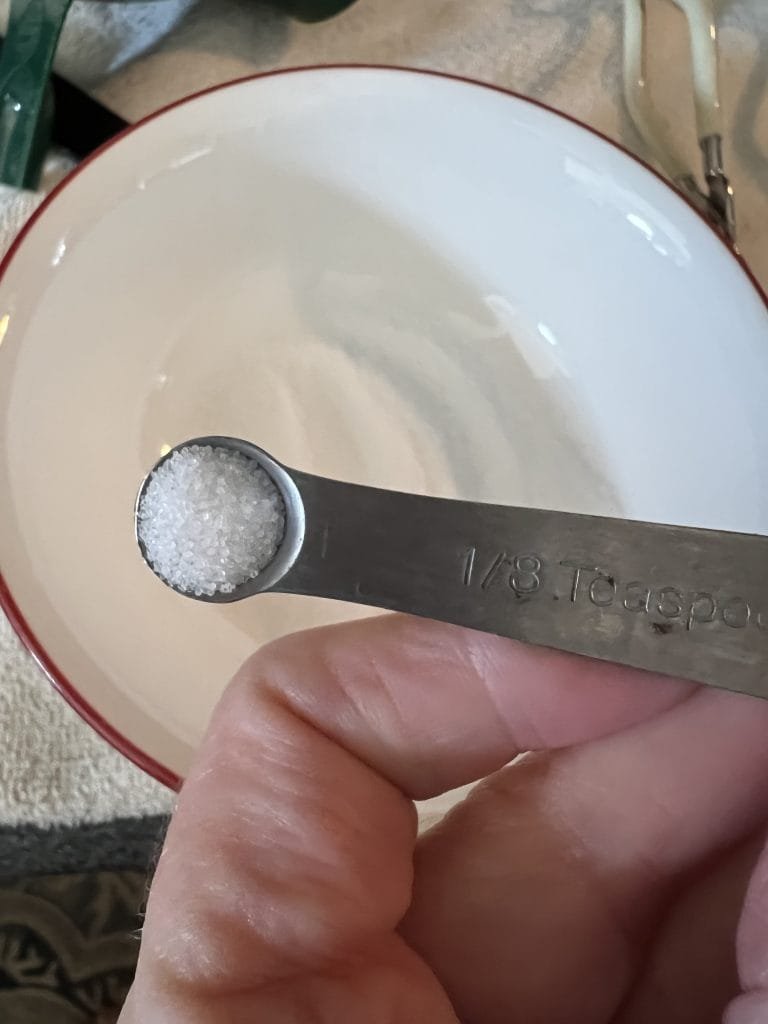
I always measure the amount of salt into each jar. Use pure salt for this as table salt is not recommended due to additives in it.
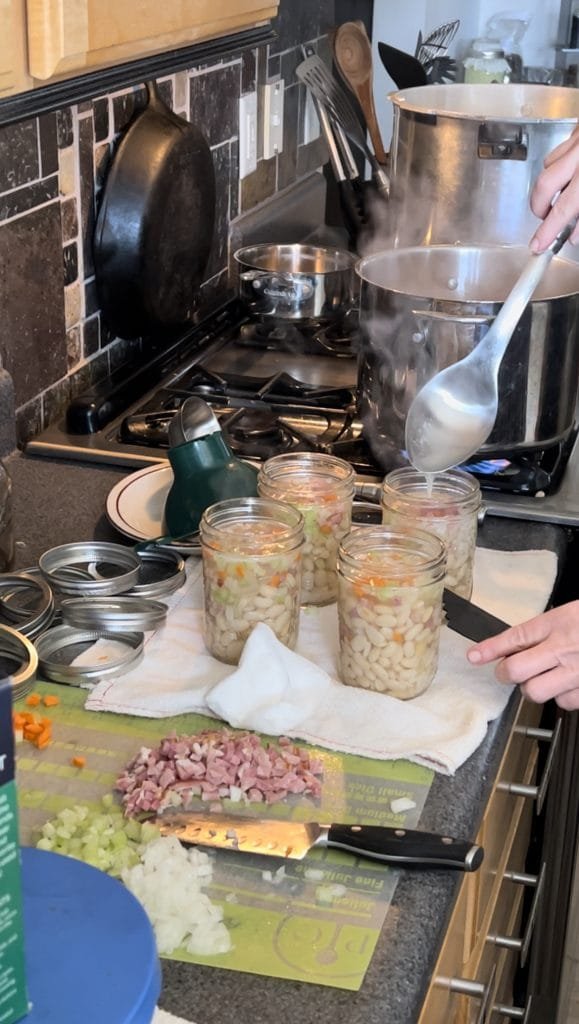
Below you can see that I have my jars out and they are being filled with my pressure canned ham and bean soup. It’s recommended to fill the jars half full with your bean soup mixture. I may be pushing it past that just a bit here but you will see they turn out just beautifully! Be sure to add your hot beans before adding those cold ingredients to a hot jar. Thermal shock is a real thing and will often crack a jar. It’s just not worth doing it in any other order! The beans will keep the jars hot long enough for you to get your hot bean water into the jar.
Making the Pressure Canned Ham and Bean Soup

Fill hot jars with hot beans 
Adding the carrots and ham then celery and onions for flavor 
Add hot bean water to just about 1 inch from the top of the jar
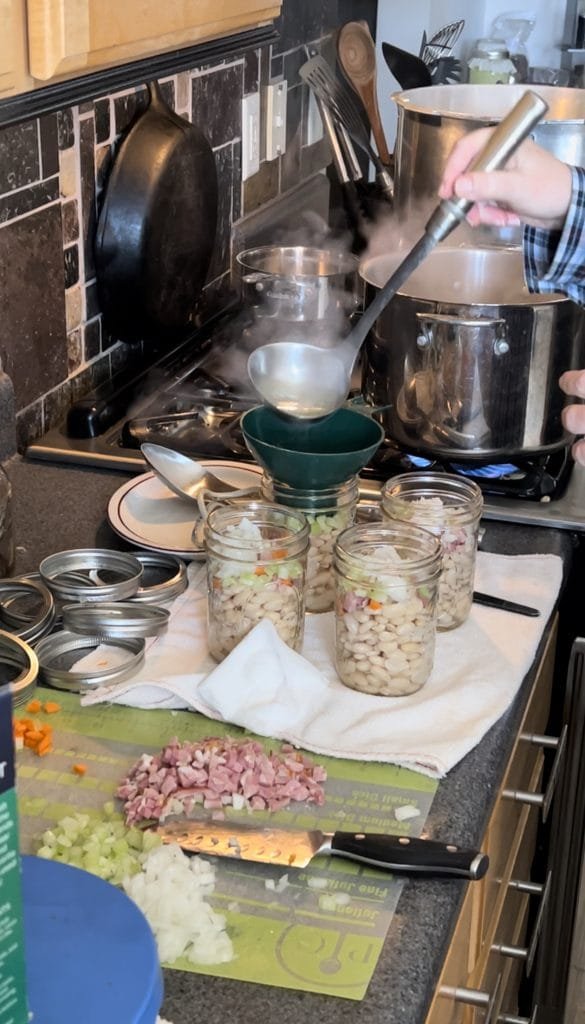
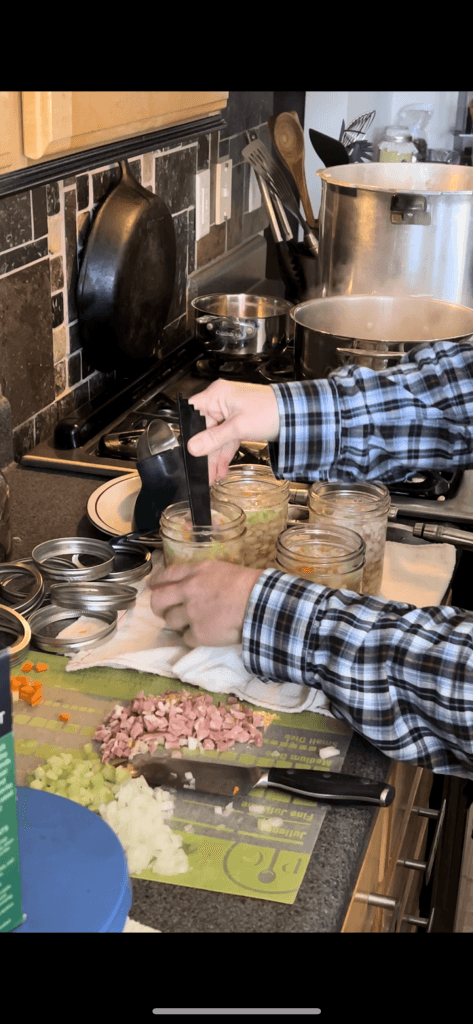
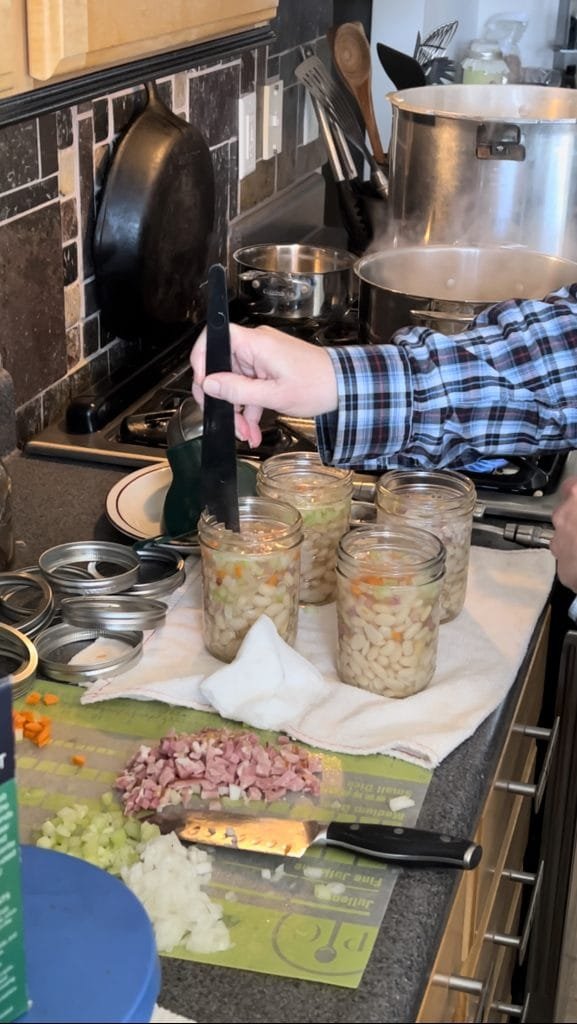
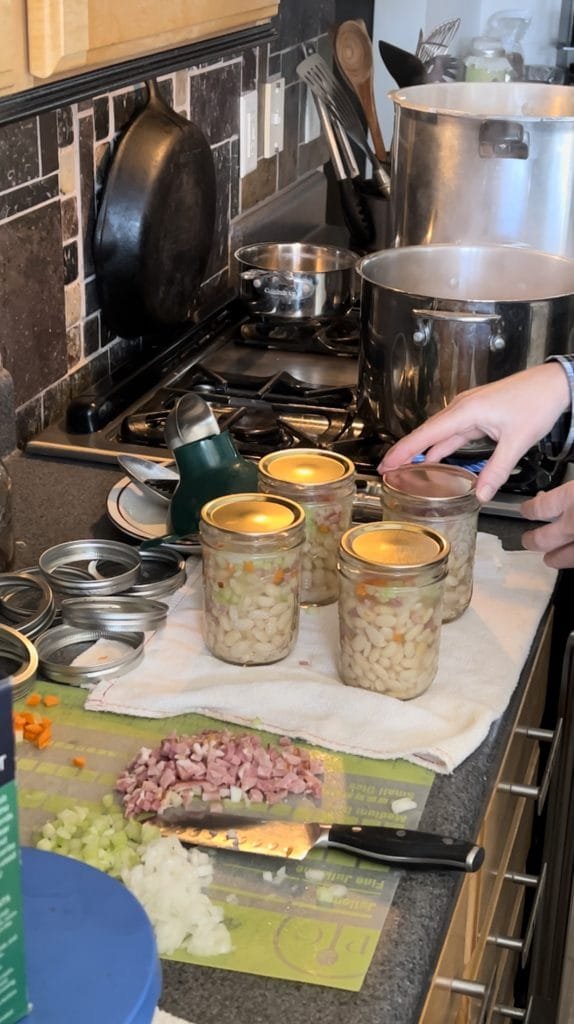
Now you can use your cool canning tools. This black tool below does double duty for me when canning. I use it to remove any air bubbles or pockets of air and then flip it over to measure for the proper head space. This pressure canned ham and bean soup calls for a 1 inch headspace so everything should be under the water lever one inch down from the top rim of the jar. If you don’t have enough,simply add liquid to raise the level. If you have too much in the jar, use a small spoon to either remove some of the solids to lower the level or remove some of the hot bean liquid until you have 1 inch clearance.

Remove any air pockets or bubbles by stirring around the jar of beans. 
Measure for proper 1 inch headspace. 
Add or remove liquid as needed.
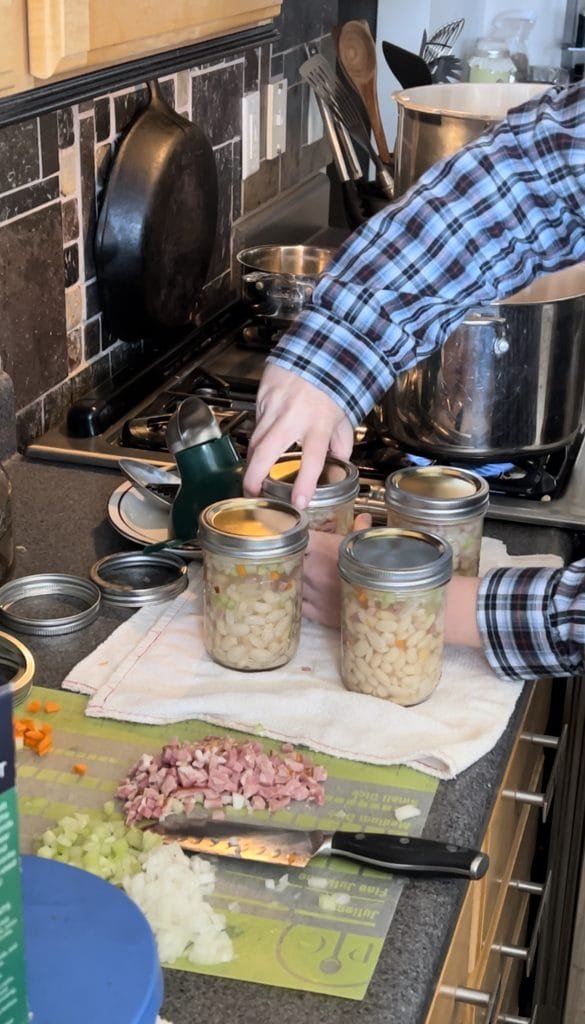
Here is where my folded, vinegar-soaked paper towel comes in handy. Use this to wipe off anything that may have come in contact with your jar rim. You might think that because you used your fancy canning jar funnel, that you don’t need to do this step, but trust me, you do! Once that is done, add the flat part of the lid to the jars. Next up, you simply add the rings to hold the flat part on while canning. Fingertip tight is what they say to tighten it to. I always turn it until I feel resistance or the jar starts to turn with it. I feel that has always worked for me. People often comment on my YouTube videos that I really crank the lids down but really, I’m using wide mouthed jars so it naturally looks that way. If I were using the smaller lids and rings, I wouldn’t have to stretch my hand out as far making it look like a harder crank.
Wiping the rim with my vinegar soaked paper towel. 
Add the flat part of the lid to the top of the clean rim of the jar, Add the rings to fingertip tight.
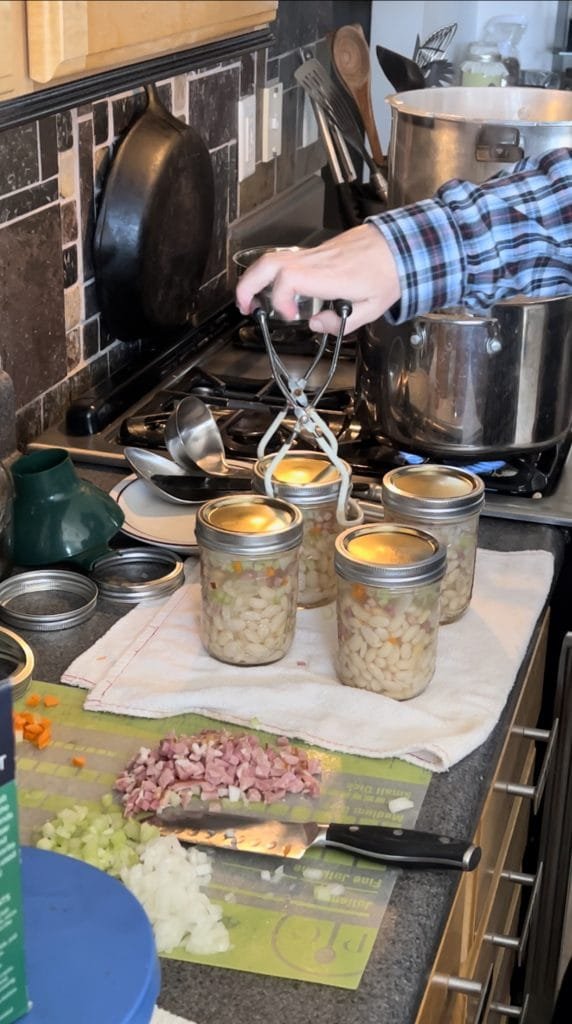
If you need to get these cool canning tools so you can make this pressure canned ham and bean soup yourself, check out this set of canning tools available on Amazon so it ships right to your door. We order lots of stuff from here! Here is a picture of it so you can see it has all the basics and even a couple of extras. Here is a neat kitchen hack that you can use the jar lifter for other than canning food.


I am picking up the first jar for the pressure canner with my jar lifter tool. As I put them in the hot pressure canner, I bring a hot jar back with me to be filled. 
The last 4 jars you do just like the first 4.

Pressure Canning the Ham and Bean Soup
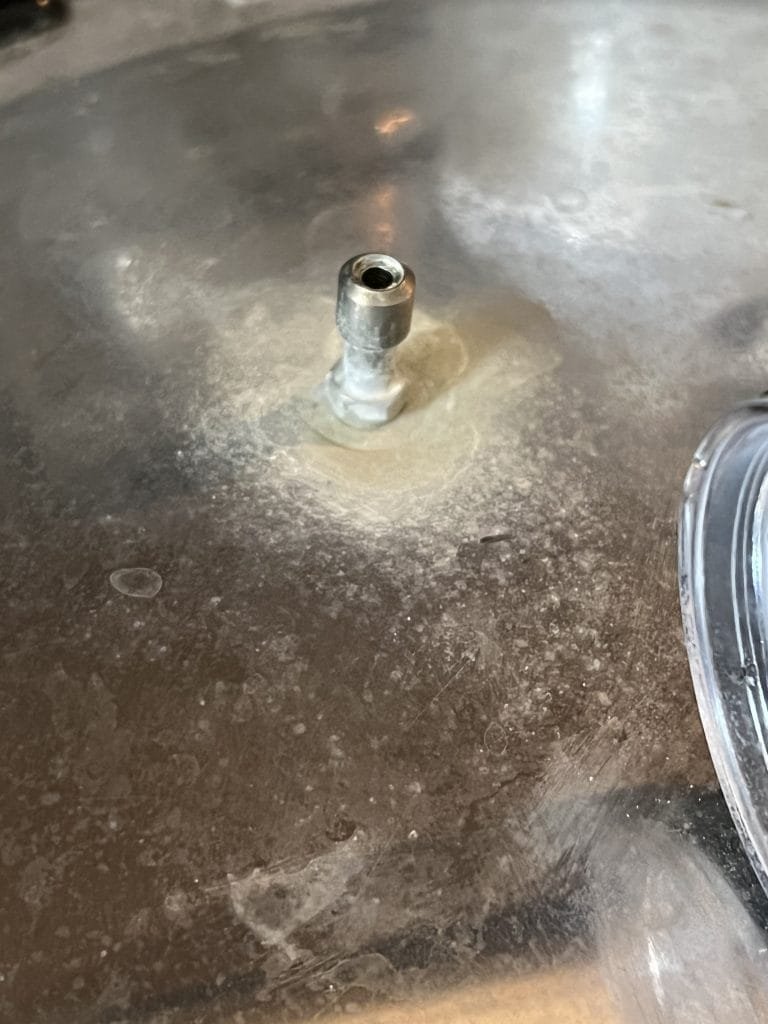
Now that the jars are all in the pressure canner, let’s add the lid. Be sure you have already looked through the vent hole in the lid to see that it is clear before putting it on. Lock it into place and wait for the steam to start coming out of that vent hole. Once it does, start a timer for 10 minutes. The lock should pop up near the end of the 10 minutes.
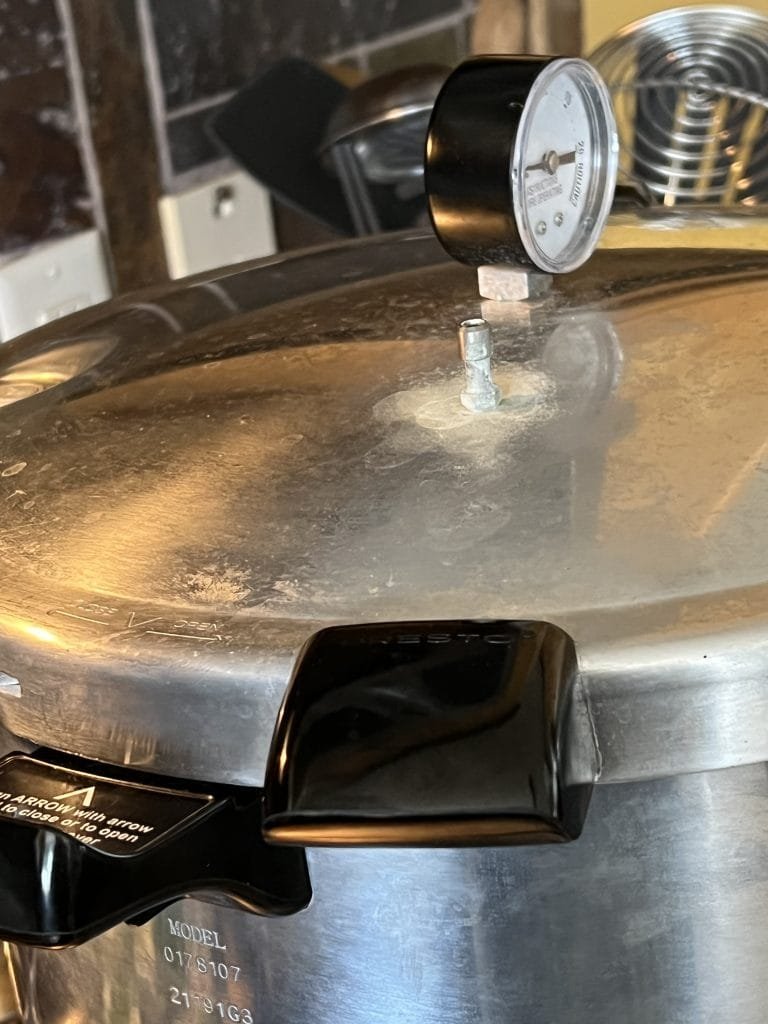
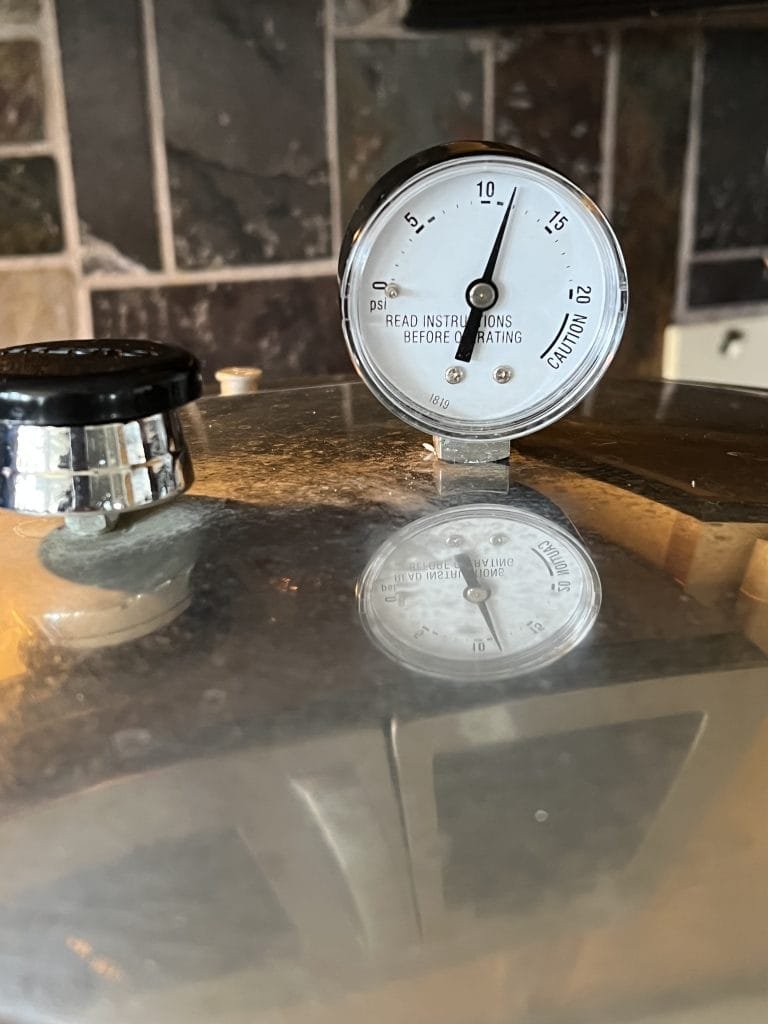
Add the weight once the 10 minute timer goes off. It’s important to watch your pressure canner closely now until it gets up to pressure. Once I get it up to 5 pounds of pressure, I turn my heat down about 1/4 turn and monitor to see that it is continuing to rise. closer to 8 pounds, I’ll turn it down again and monitor to see it continues to rise.
I do this so that I don’t have to guess where the heat knob will need to be once I get it up to pressure. Sudden changes in the heat source can cause your liquid inside the jars to siphon out and this allows stuff to get on the rim and cause jars not to seal. I know where my sweet spot is on my gas burner and I have learned when to turn it down while making my pressure canned things so that it stays right at the pressure needed. You will learn too, with practice and time.

This is the vent plug that you want to be sure is clear Lock the lid and vent steady steam for 10 full minutes. Drop the weight on after the 10 minutes is up. Slowly turn the heat down as the pressure starts to rise. Start a timer once it gets to 11 pounds of pressure.
Start a Timer
Get the timer going for 60 minutes once it gets up to pressure.
Learn the Sounds of Your Pressure Canner
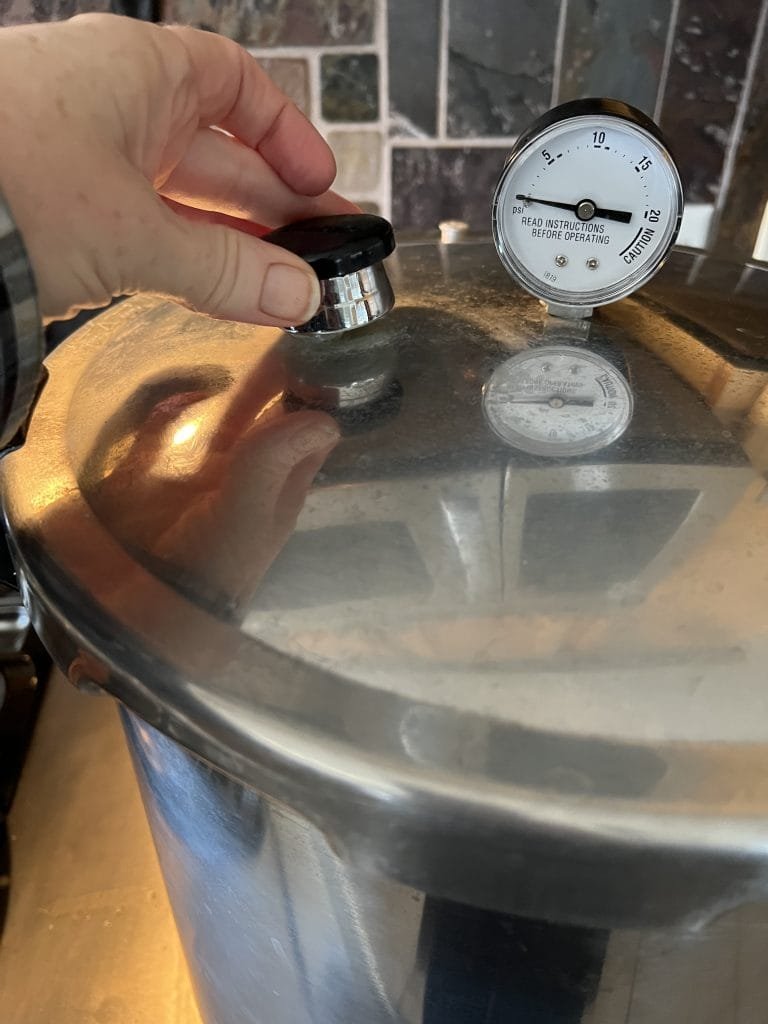
If your canner is going over the limit of the weight on top of your canner, it will start to rock. With a dial pressure canner, the weight is set for 15 pounds of pressure. If you hear it starting to rock or make noise, you know that your heat is too high and needs to be turned down. Just be careful not to turn it down so far that it loses pressure below your 11 pounds of pressure or you will have to start your timer again.
Once the timer goes off, turn off the heat to your burner. Do not touch the canner again until the lock drops and you have 0 pressure. This takes about 40 minutes. You can then verify the pressure is at zero and remove the weight. Give it another 2 minutes before removing the lid. Remember to open it away from you because it will be a steam bath if you don’t.
Now wait just 10 more minutes before removing them from the canner. You want to let them cool down naturally in the water a but so they don’t siphon as you pull them out. Remember drastic changes in temperature is the biggest cause for seal failure due to the contents of the jar siphoning out and getting under the lid.
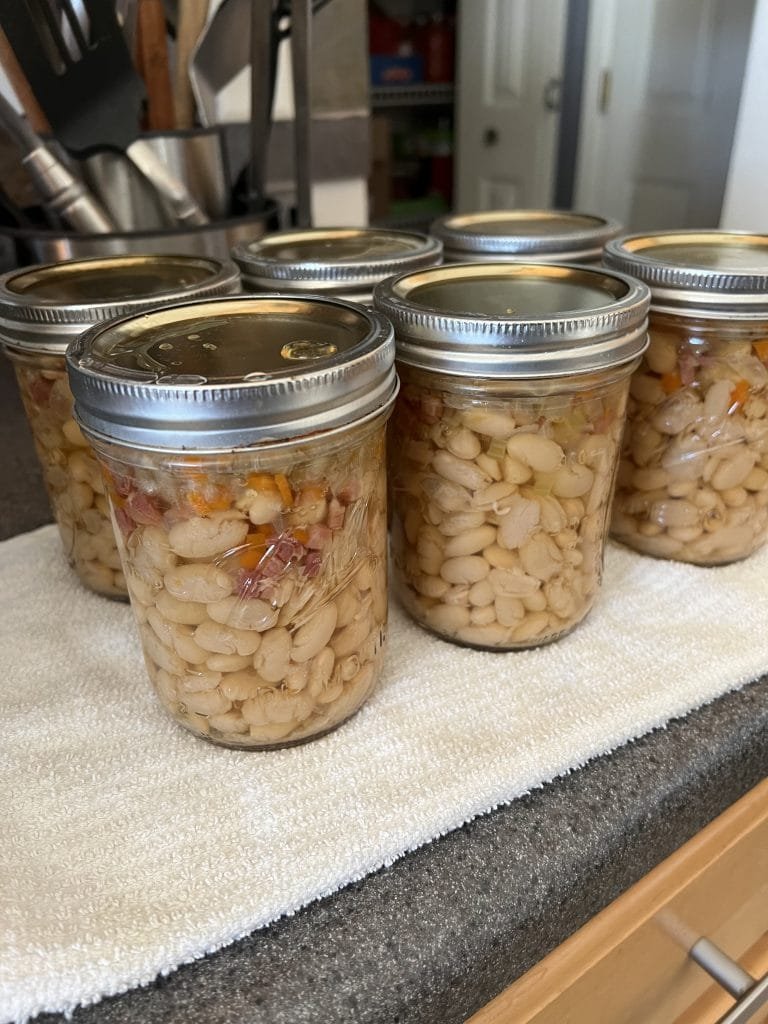
The Finished Product- Pressure Canned Ham and Bean Soup
Pressure canned ham and bean soup fresh out of the canner. 
This ham and bean soup is so nice to have on the pantry shelf!

Leave the jars alone until they have completely cooled. 8-12 hours normally works for my canned goods.
Storing the Ham and Bean Soup Once Pressure Canned
Preparing the jars for storage is easy! You simply take off the rings and wash the jars in warm, soapy water. If the lid comes off during this process, it wasn’t sealed good to begin with.
Move the jars once dried to where you want to store them in the pantry. I usually write on mine with a sharpie marker what is inside.
These won’t last long enough to worry about lid maker’s 18 month rule. You’ll be making these often
Let us know in the comments how your own pressure canned ham and bean soup turns out! We love hearing feedback about the articles we put up.